Heartbreakers and The Pixies - Selection Statements
Recently we have seen how nested loops – a loop inside of another loop – can be used to create a grid of shapes.
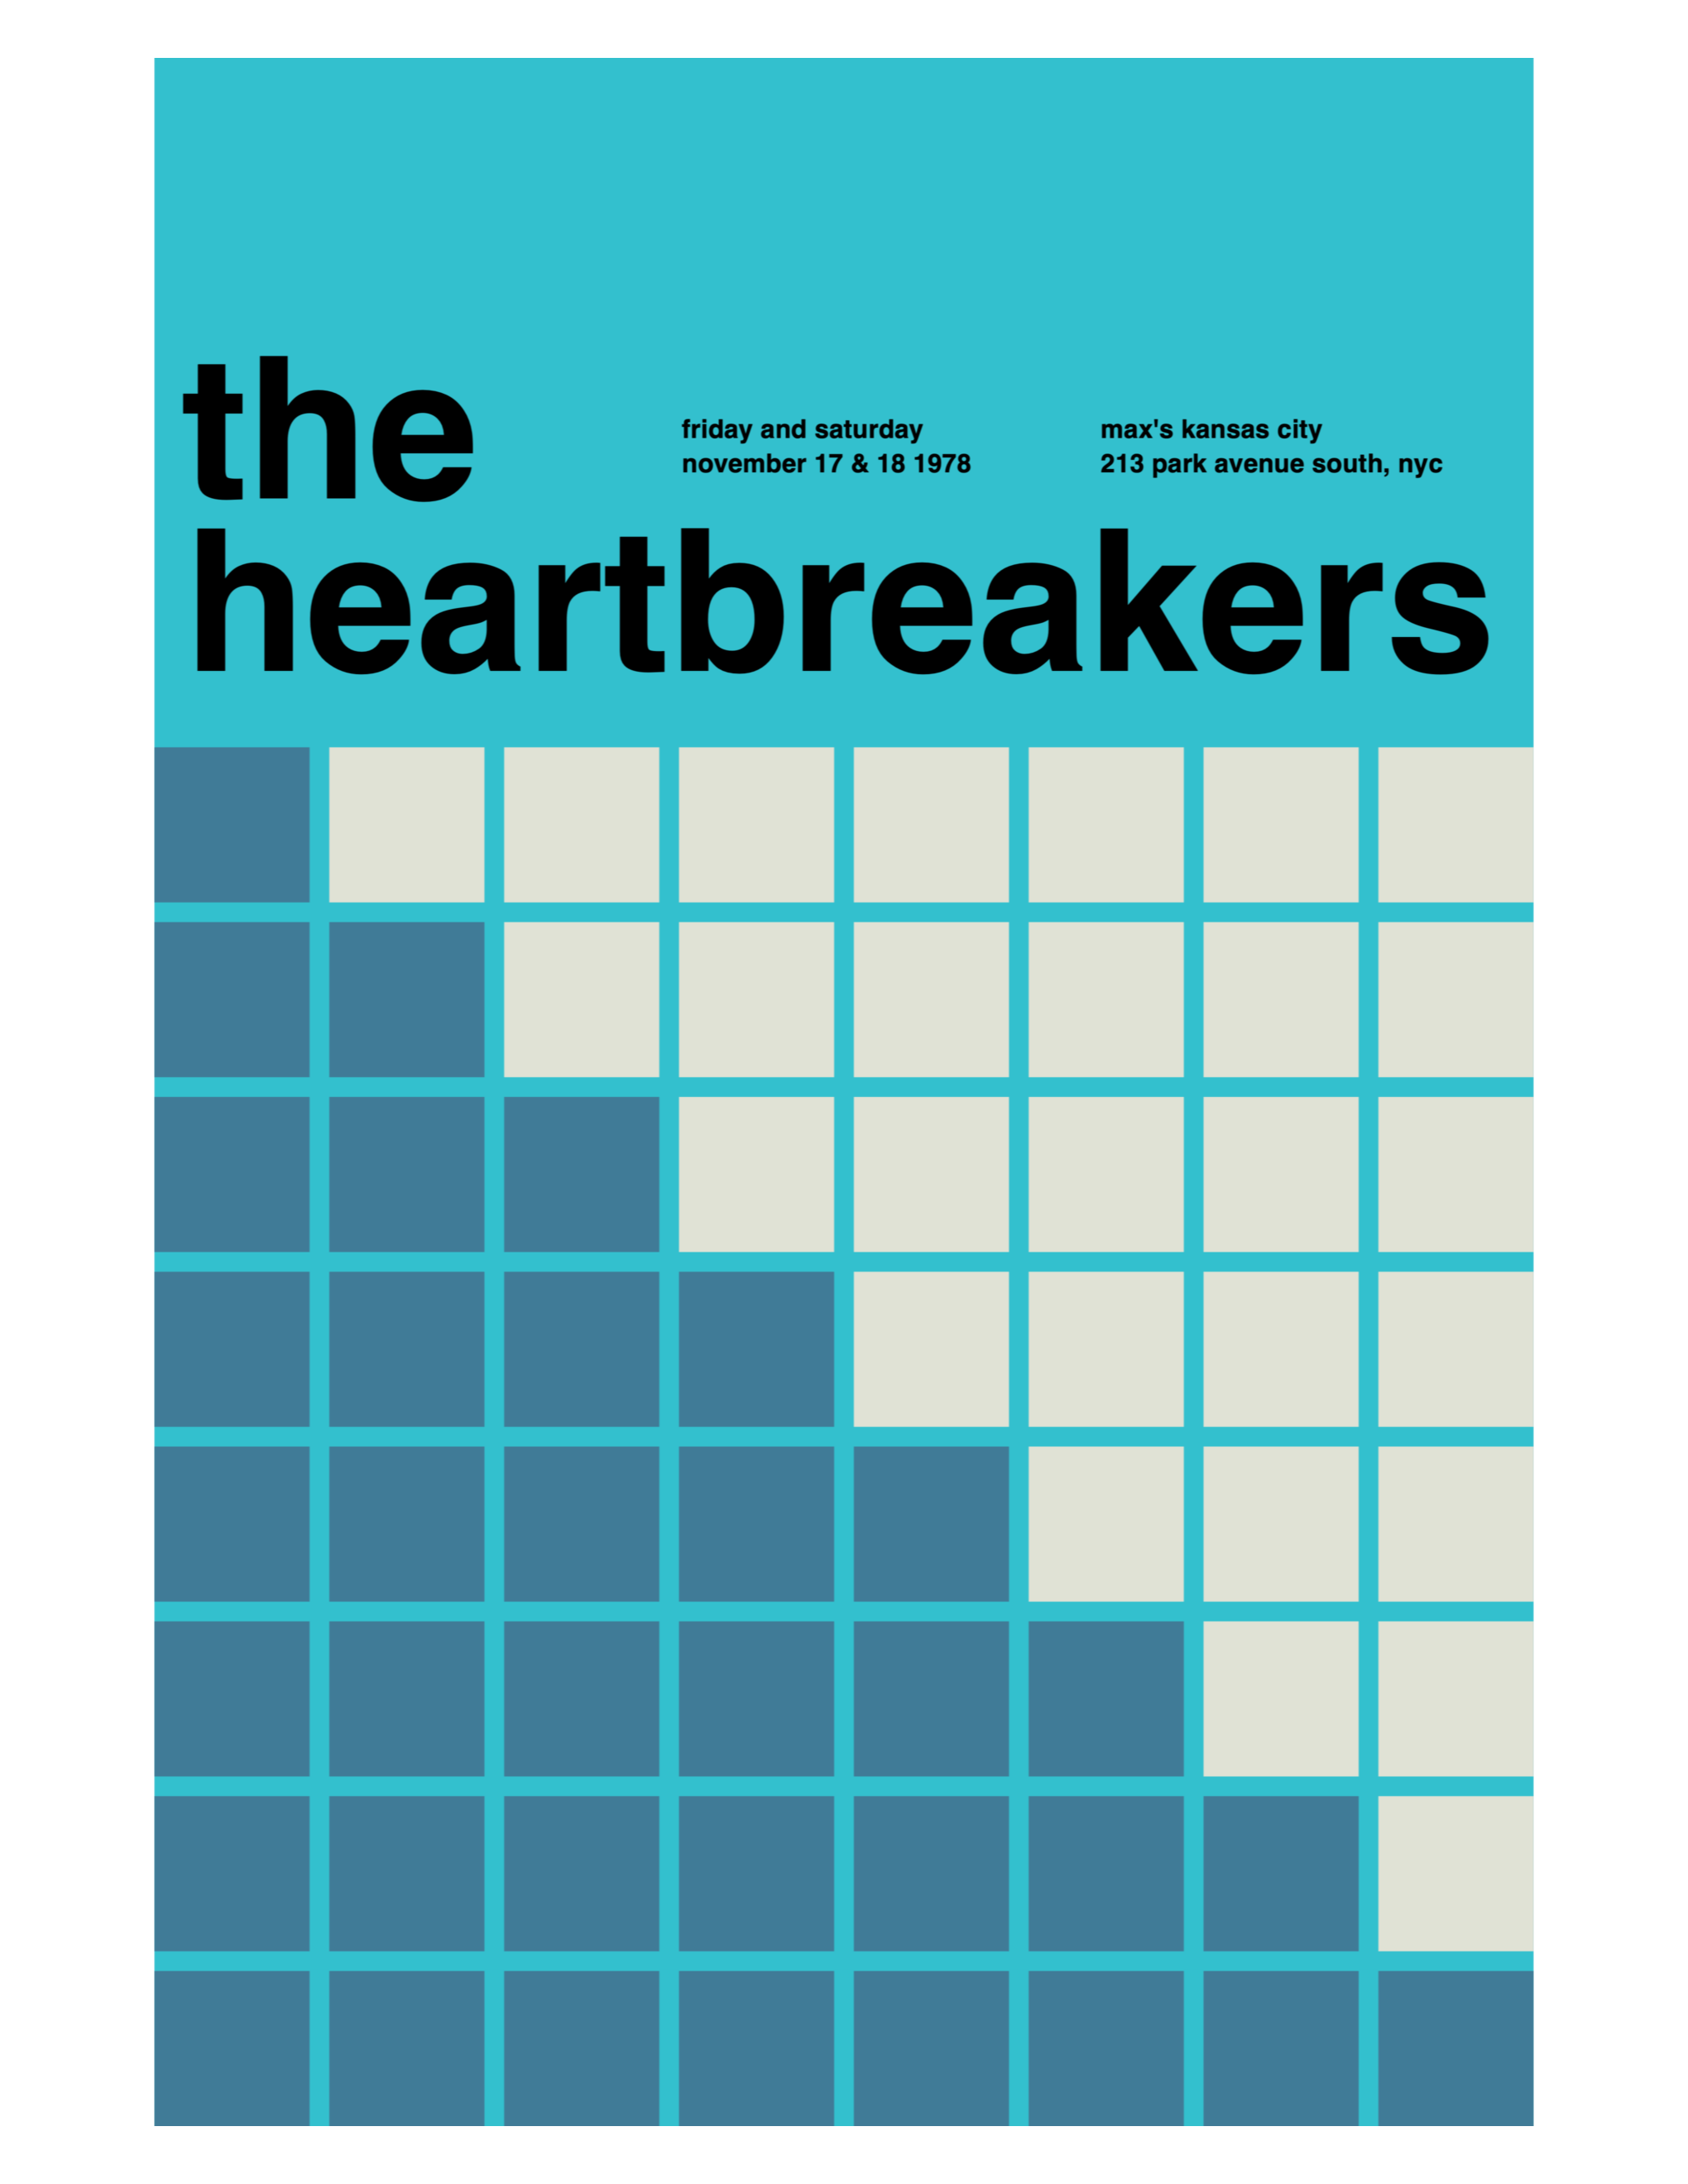
For example, consider this poster for The Heartbreakers:
The exact code for how that grid is created is not important right now.
The key question at hand:
How are some squares made to be white, and others blue?
The answer is that this comes down to selection.
When a certain condition is true, we draw white squares.
Otherwise, we draw blue squares.
Syntax
There are multiple types of programming language structures that allow for selection to occur.
In this discussion, we will look at if statements.
The general syntax is:
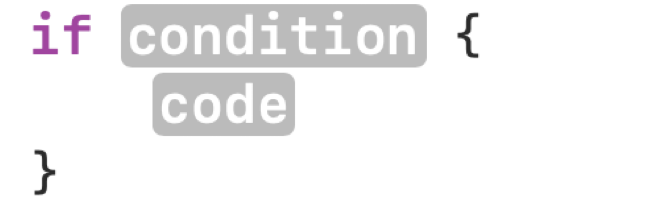
In that example, only when the condition evaluates to true does the block of code inside the { } brackets get selected to be run. Otherwise, the block of code is skipped.
Here is another example:
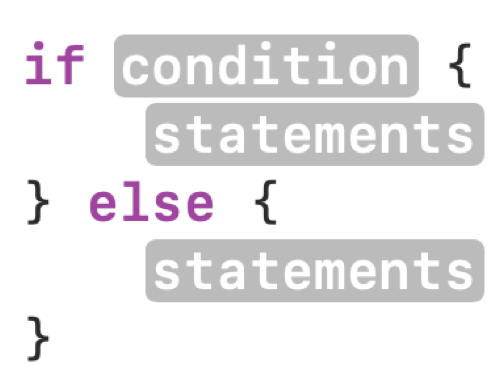
In this example, when the condition is true the first block of code runs. Otherwise, else, the second block of code runs.
Application in Heartbreakers poster
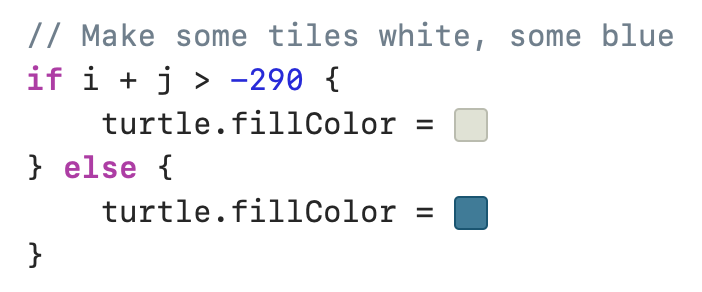
It is the second example that is being used in this poster:
The precise code is:
Let's dig into that a bit further. How did we come up with the condition to check for?
Adding some code inside the loops that draw the squares is helpful:
It is not strictly necessary that you understand that code, only that you are aware of what it produces – please examine the following output:
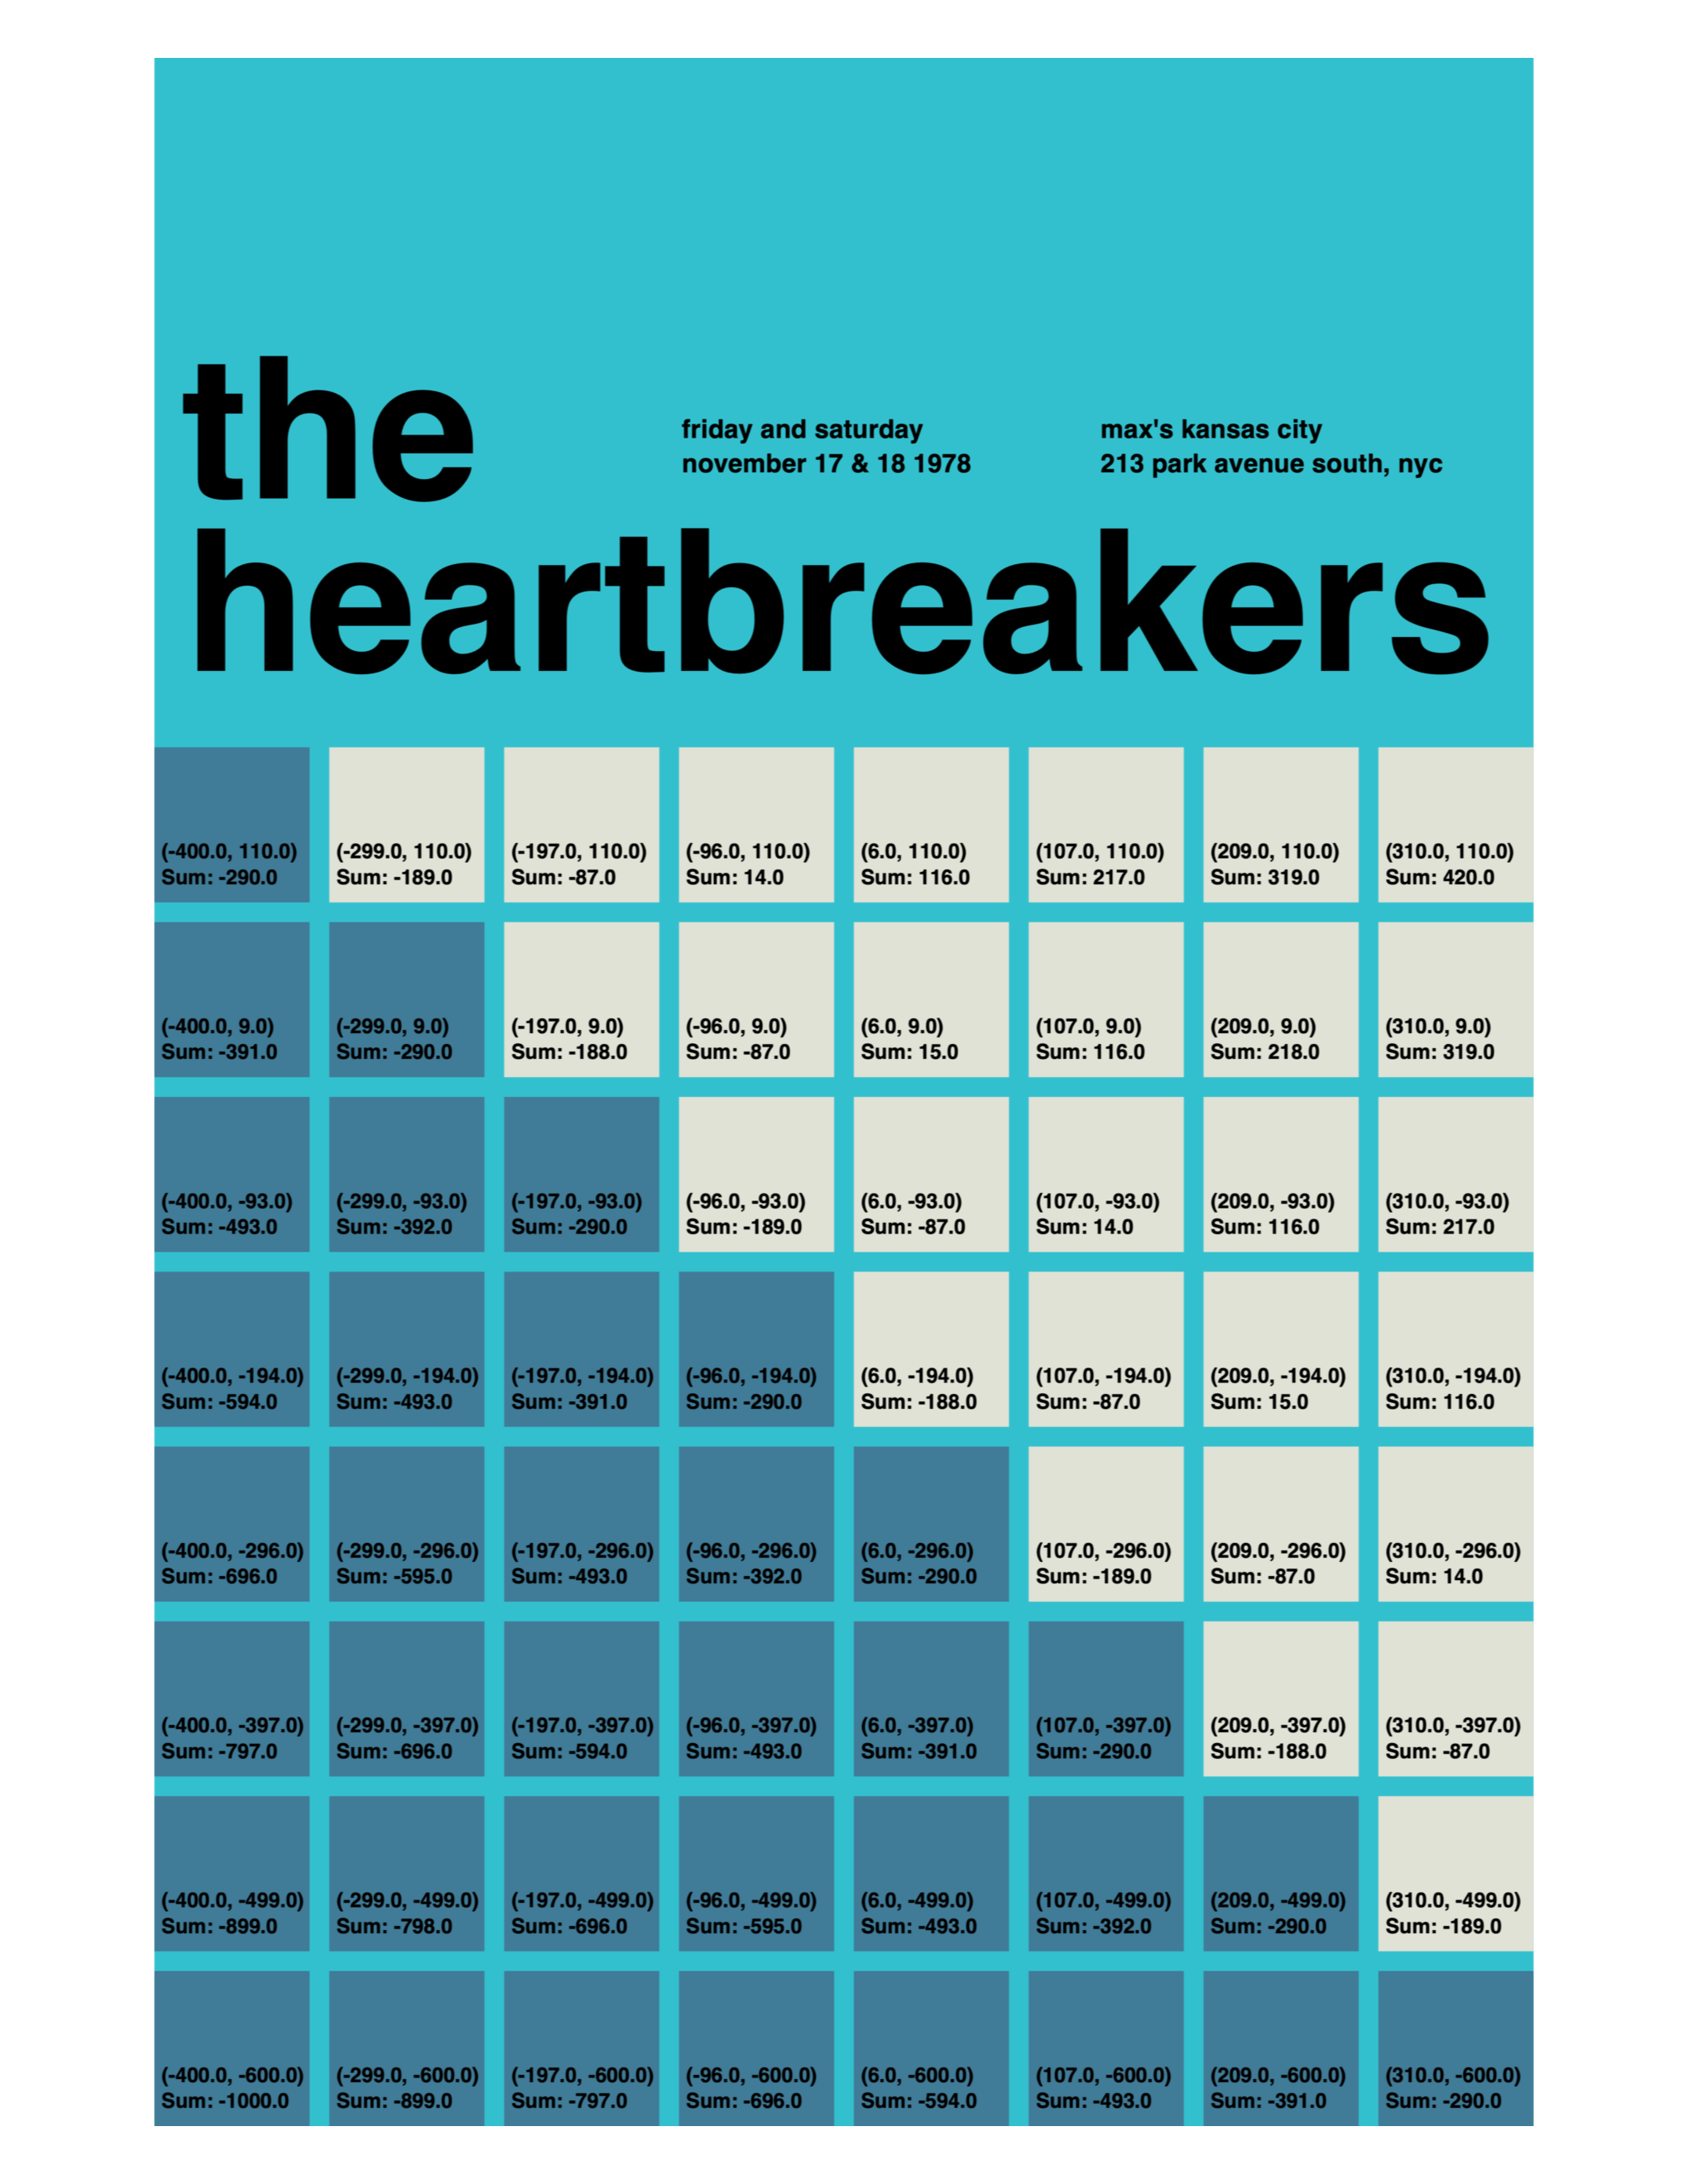
What we are seeing, for each square, is:
- The co-ordinates of the anchor of the square.
- The sum of the
and co-ordinates for each square.
Looking carefully at the sum of the co-ordinates for the squares that exist along the diagonal where we want the colour to change, we may notice something of interest:
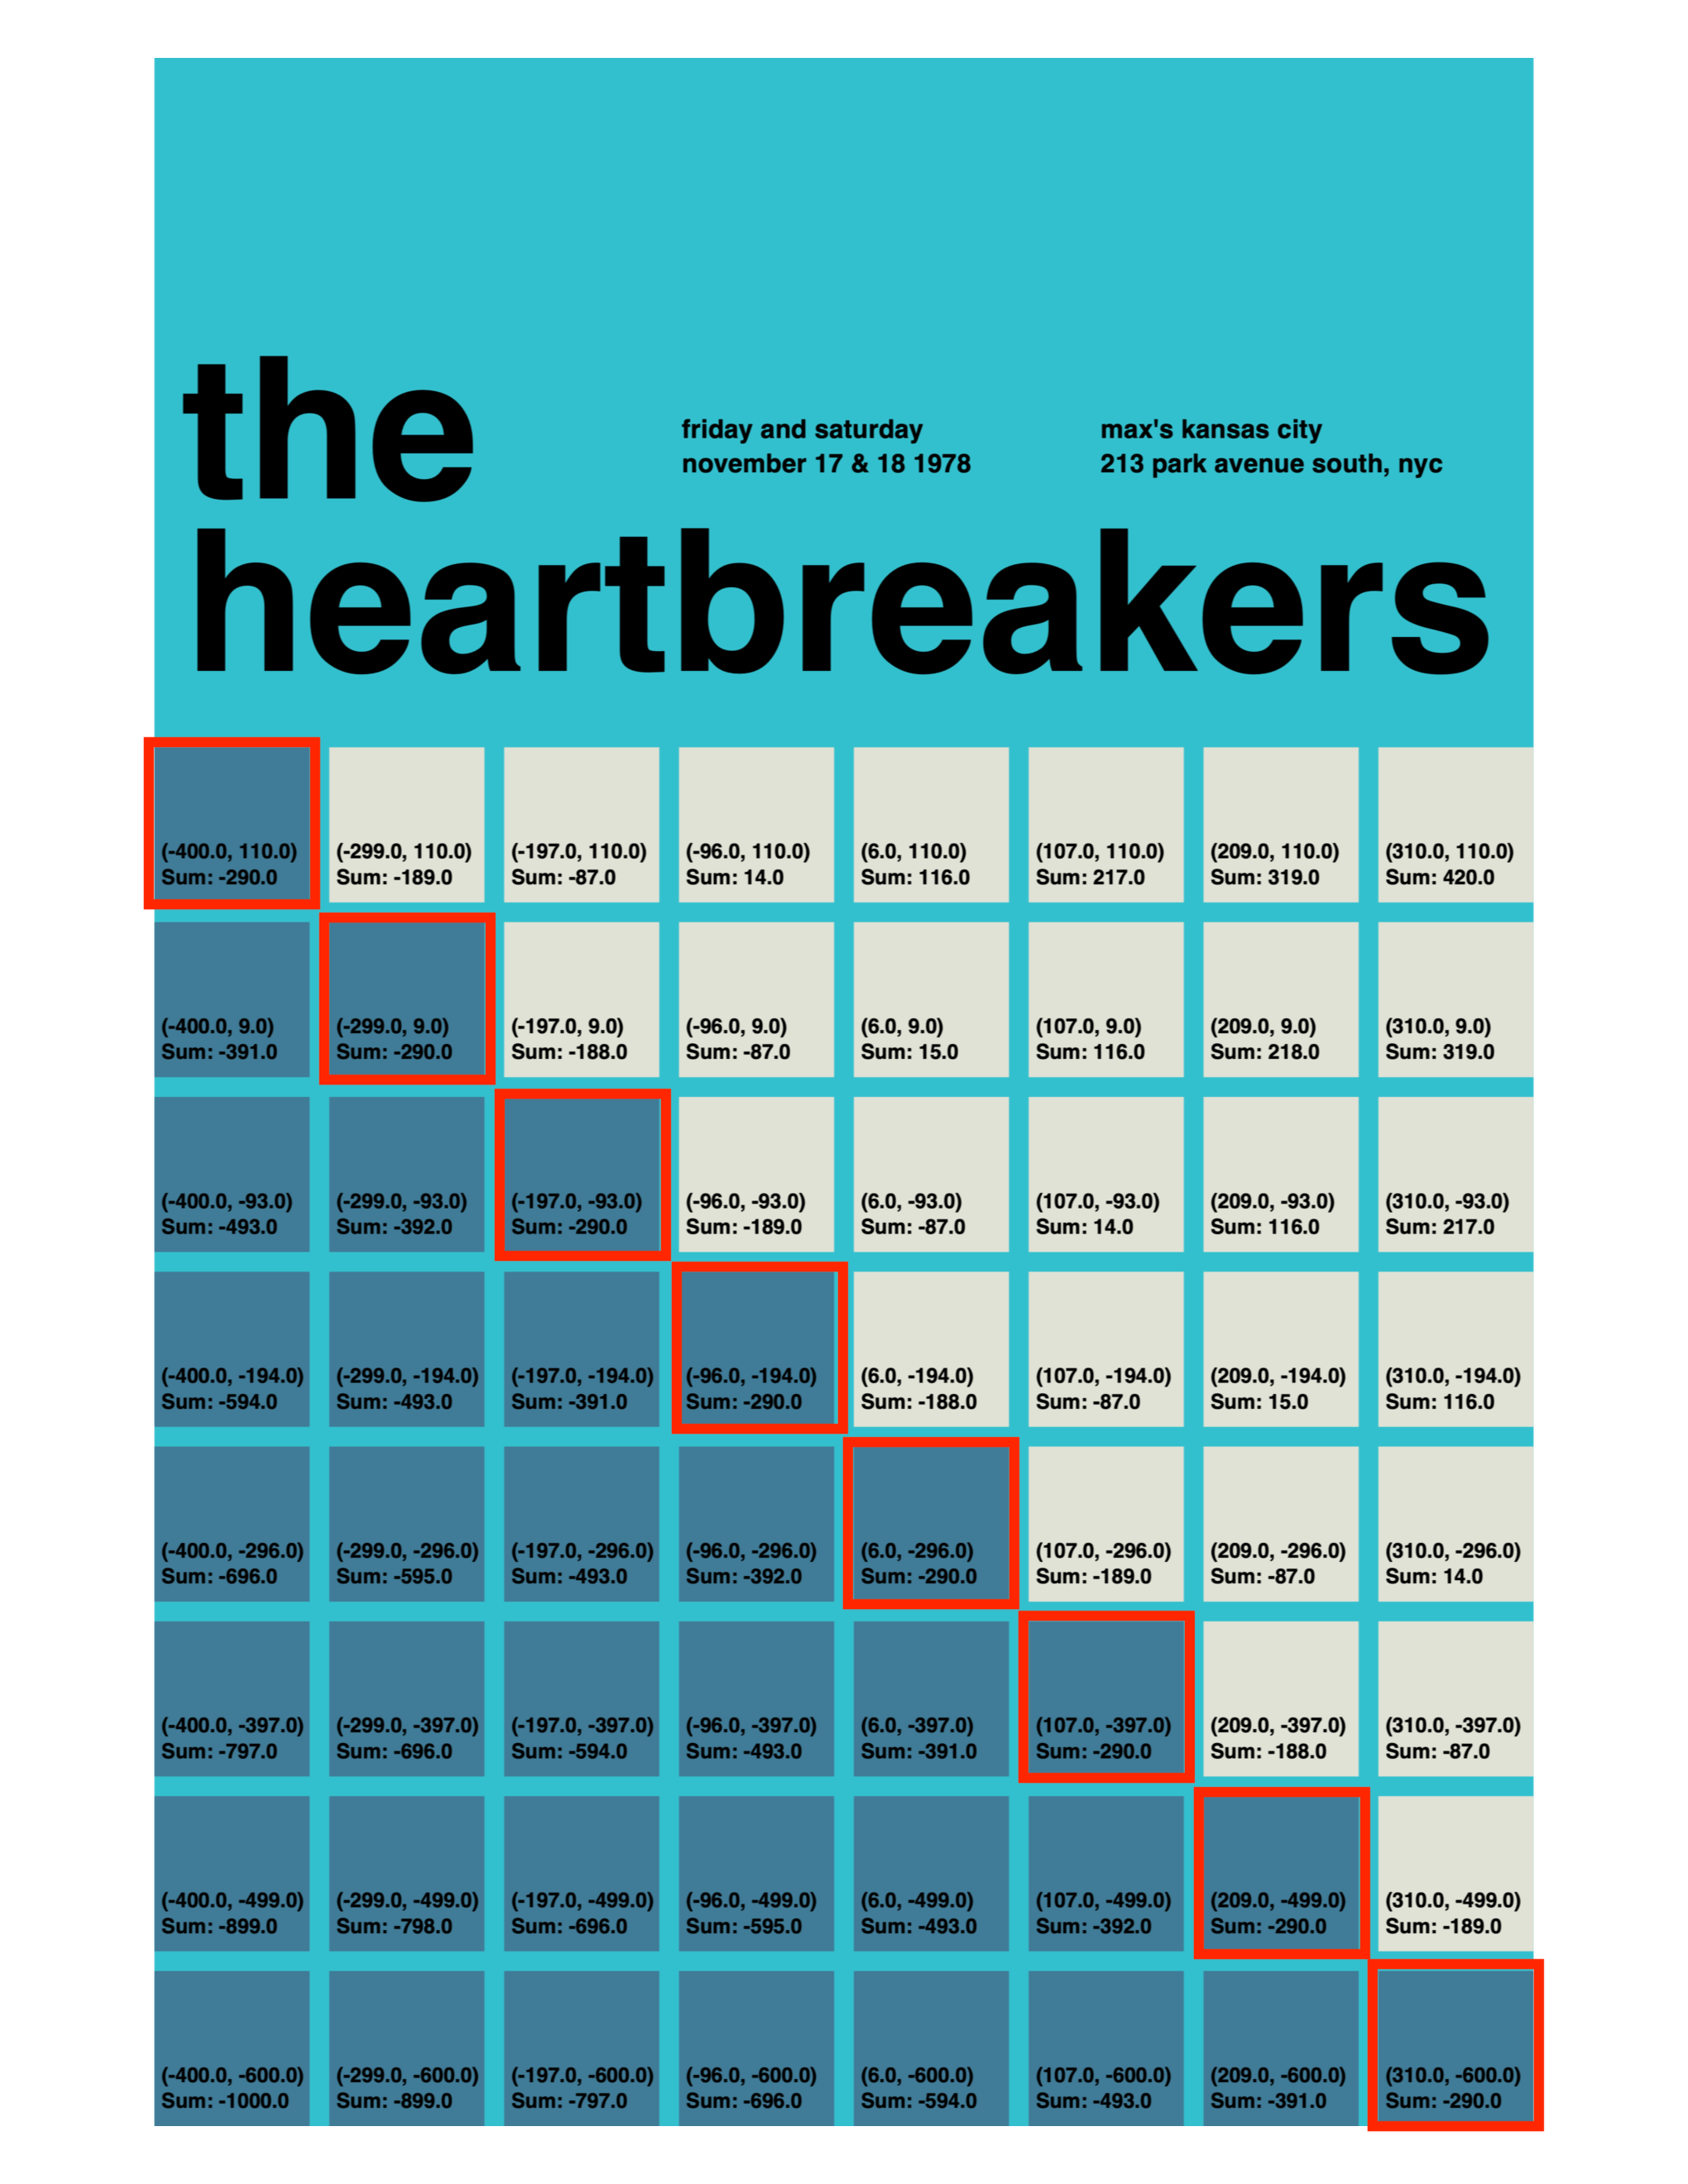
The sums on all the squares along that diagonal of interest is
Having looked carefully, we now have our condition.
We write this if statement:
... and we are selecting a portion of the squares to be drawn with a white fill:
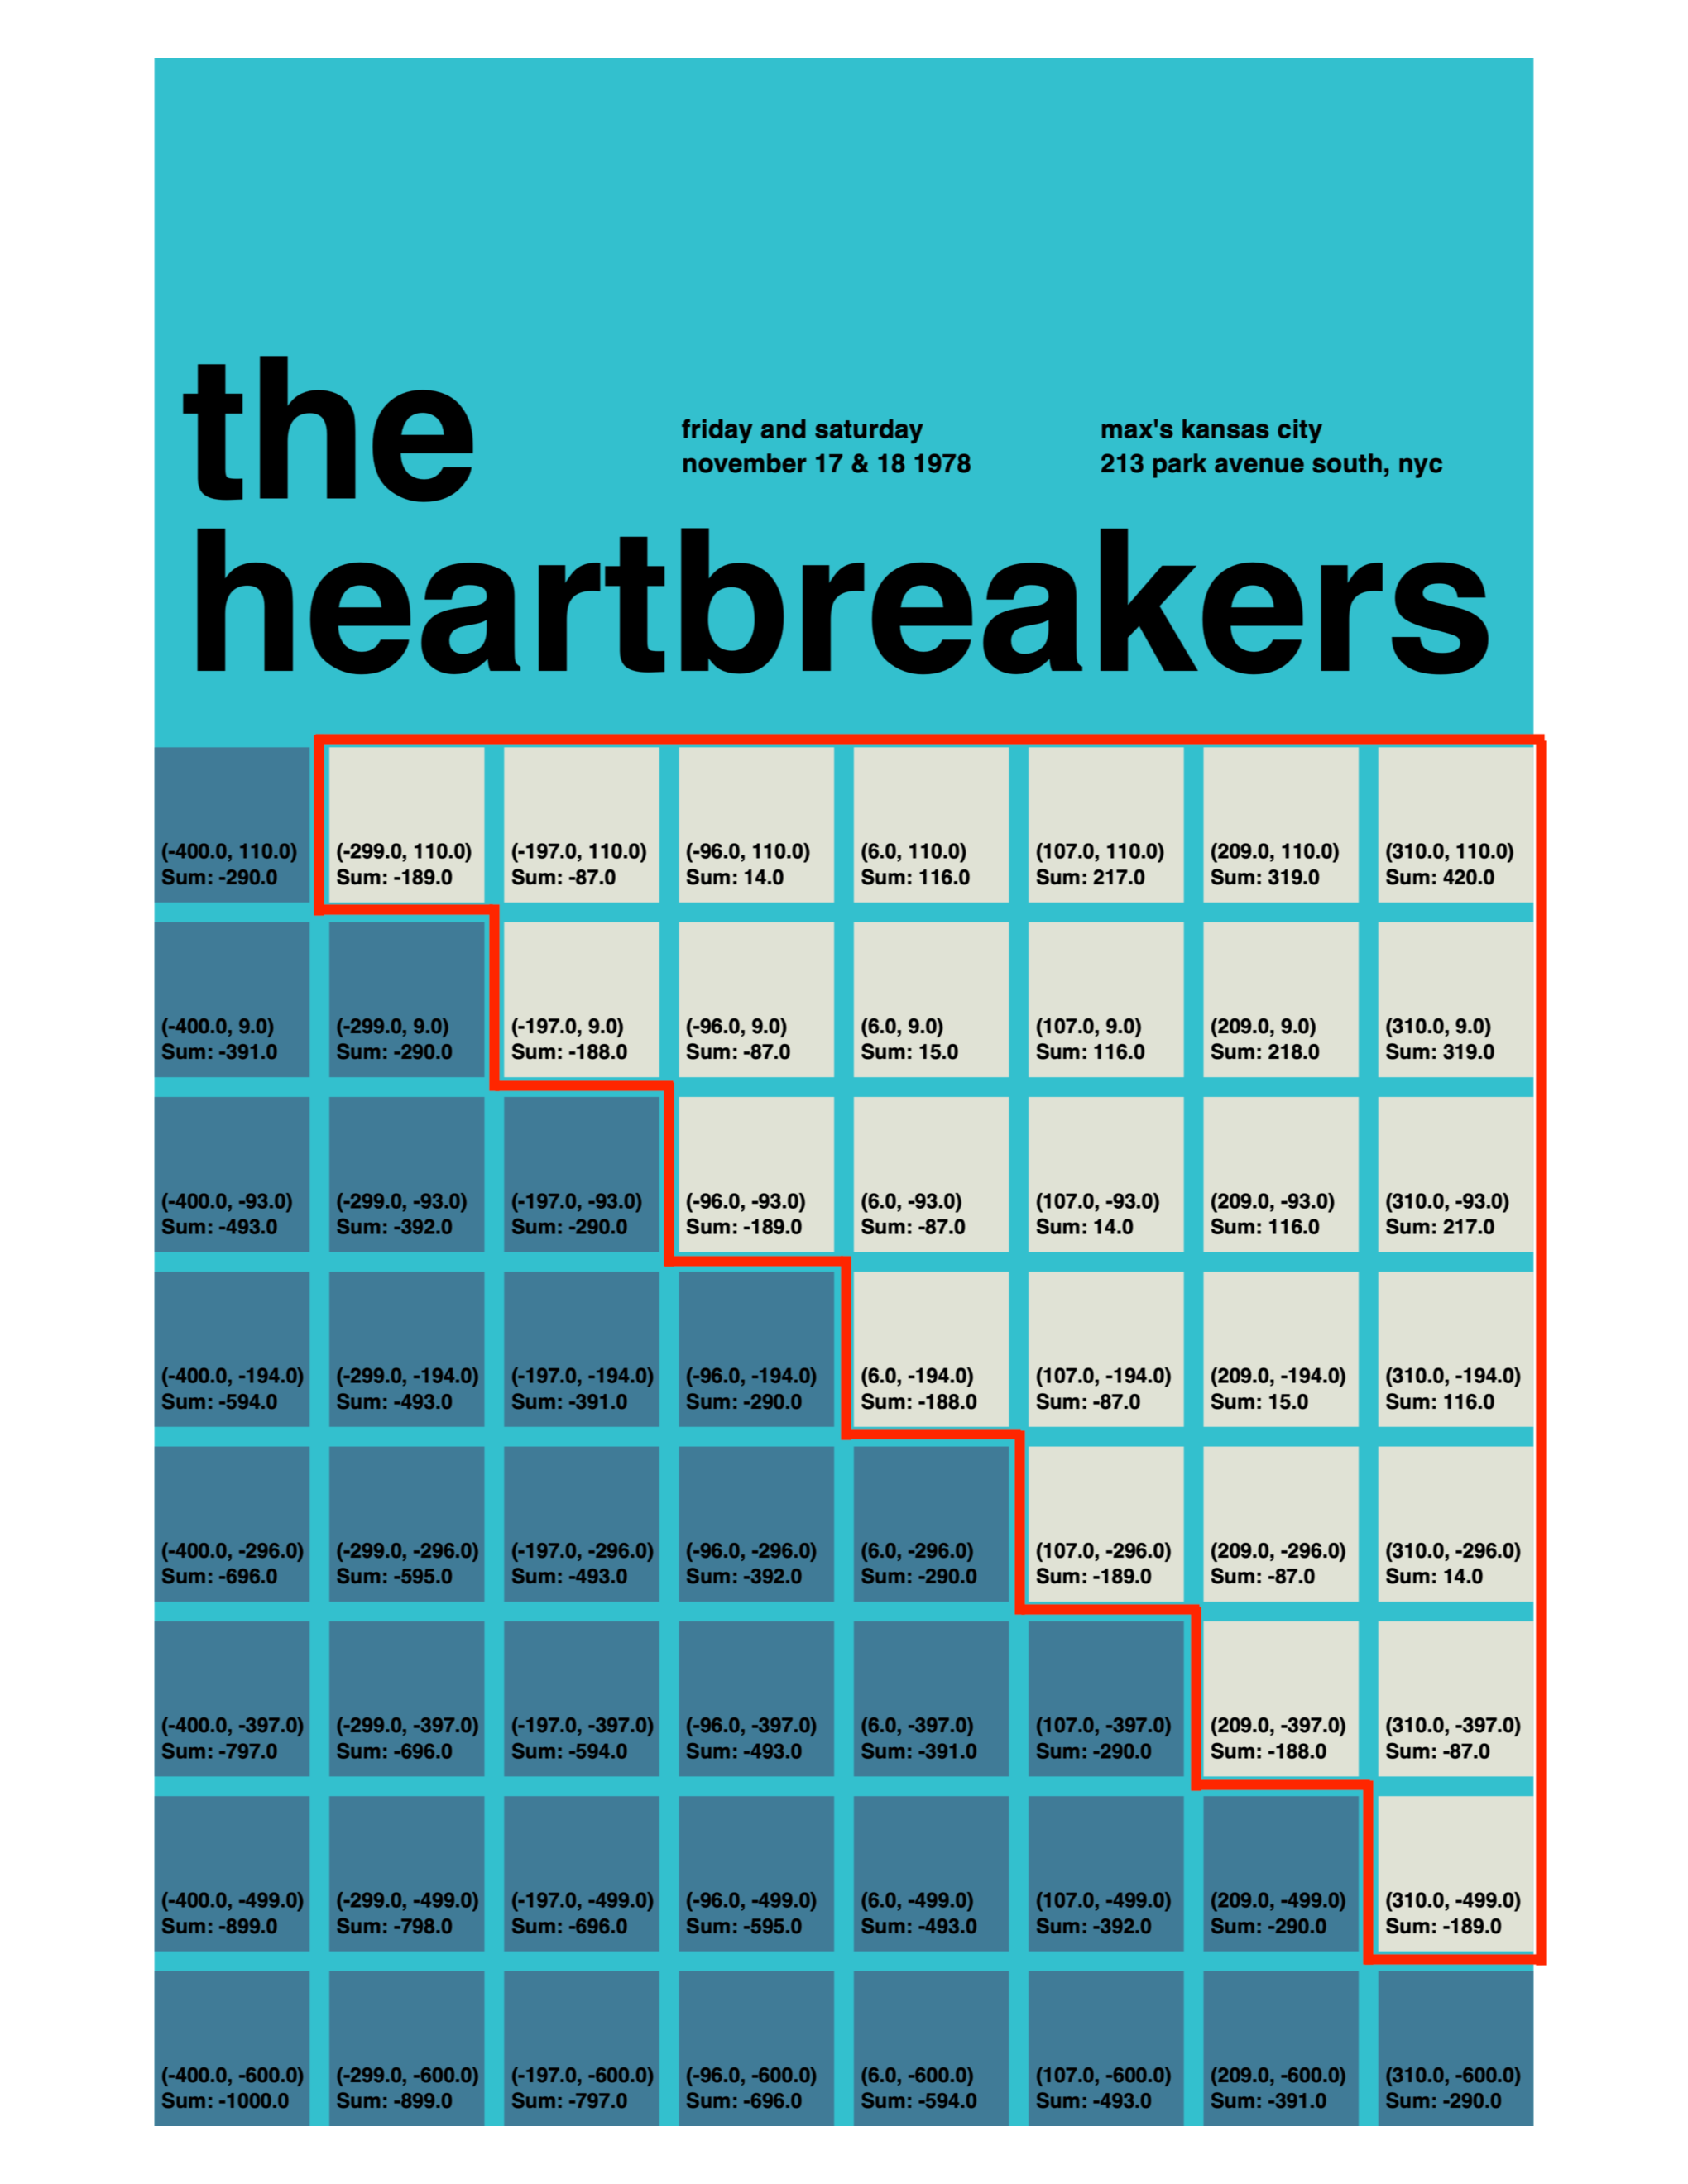
Any squares where the sum of the co-ordinates is greater than
All other squares are drawn in blue.
Arithmetic operators
The co-ordinates for the anchor position of each square were added using the + operator inside the if statement's condition:
Here is the complete list of arithmetic operators that can be used in an expression:
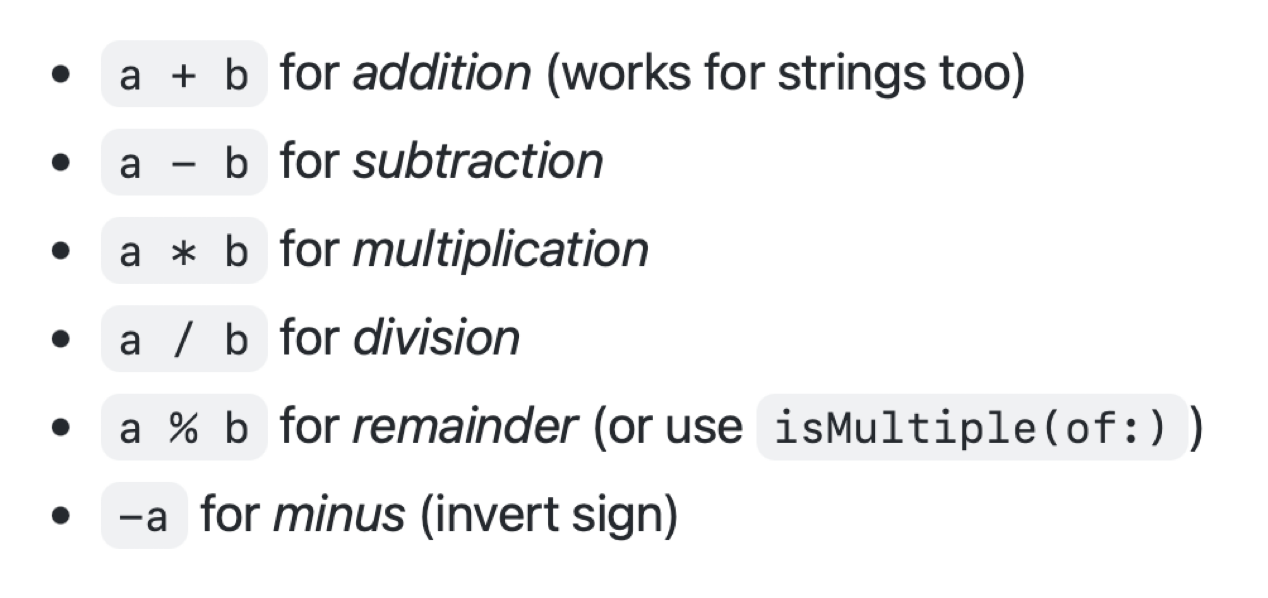
Note that the usual order of operations will be respected when brackets are used.
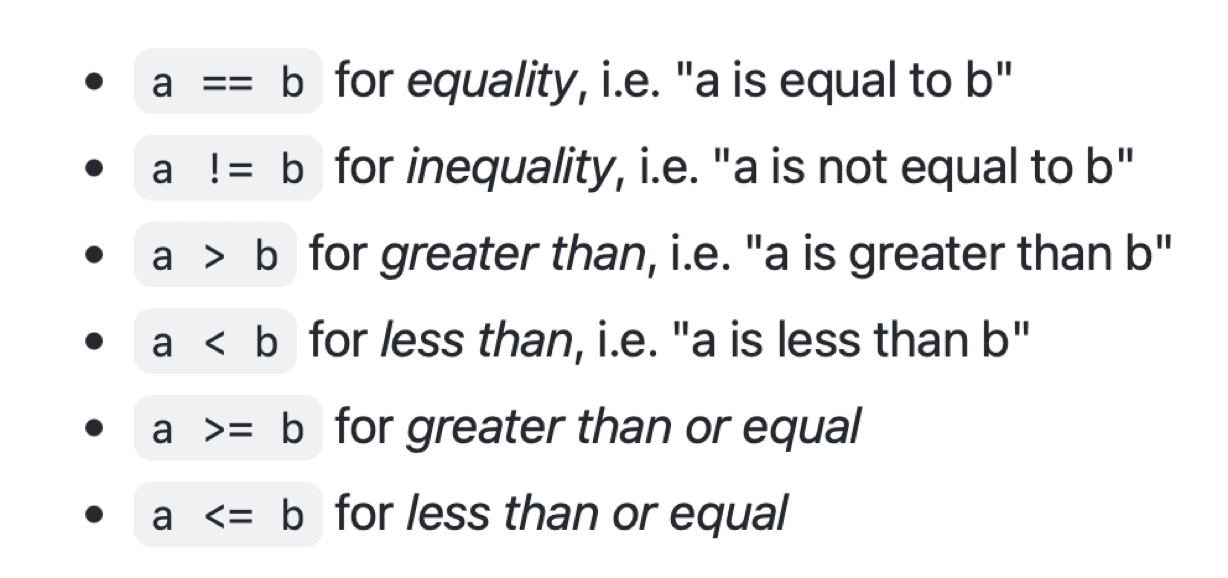
Comparison operators
We compared the sum of the co-ordinates for each square's anchor position to the value -290, using the > operator:
Here is the complete list of comparison operators that can be used in an expression:
Checking multiple conditions
In certain circumstances it is useful to check multiple conditions with an if statement.
Logical AND
Should we want to select a block of code to be run only when both conditions are true, we use the && operator, which is read as "and".
For example:

Logical OR
Should we want to select a block of code to be run when either conditions are true, we use the || operator, which is read as "or".
For example:

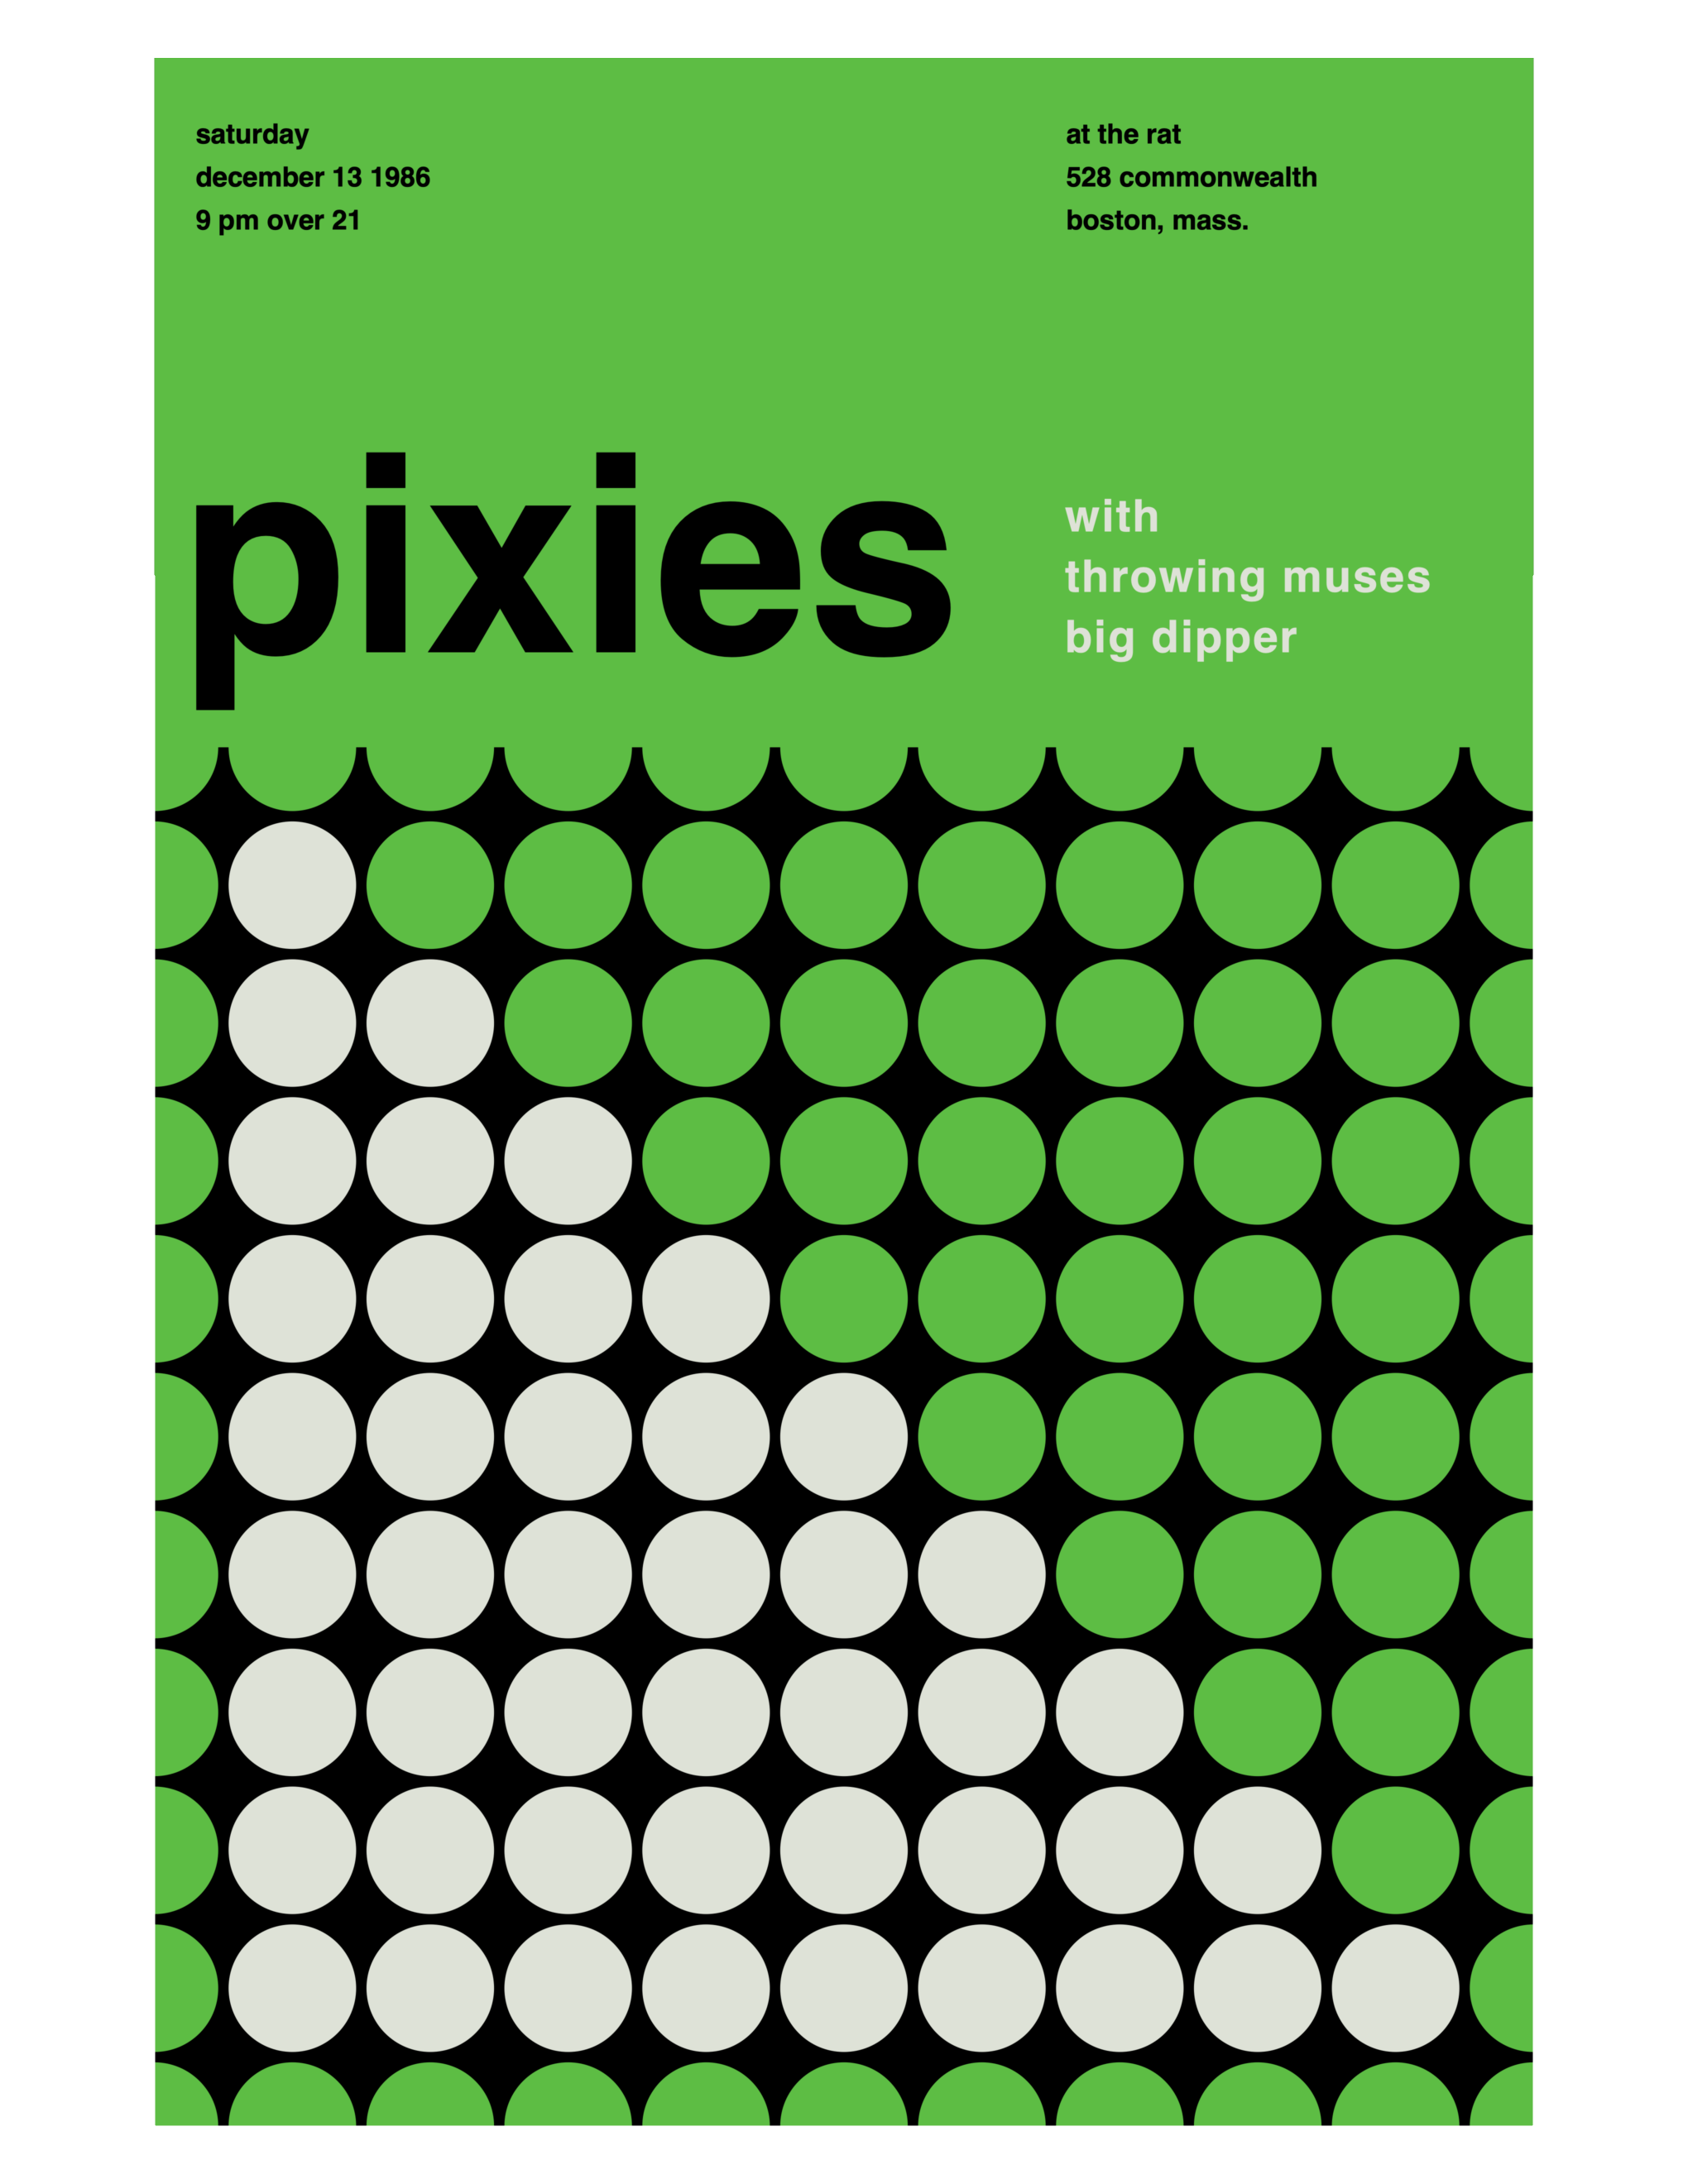
Exercise: Pixies
Apply the principles you have been introduced to above to build the following poster:
Here is the poster with a grid:
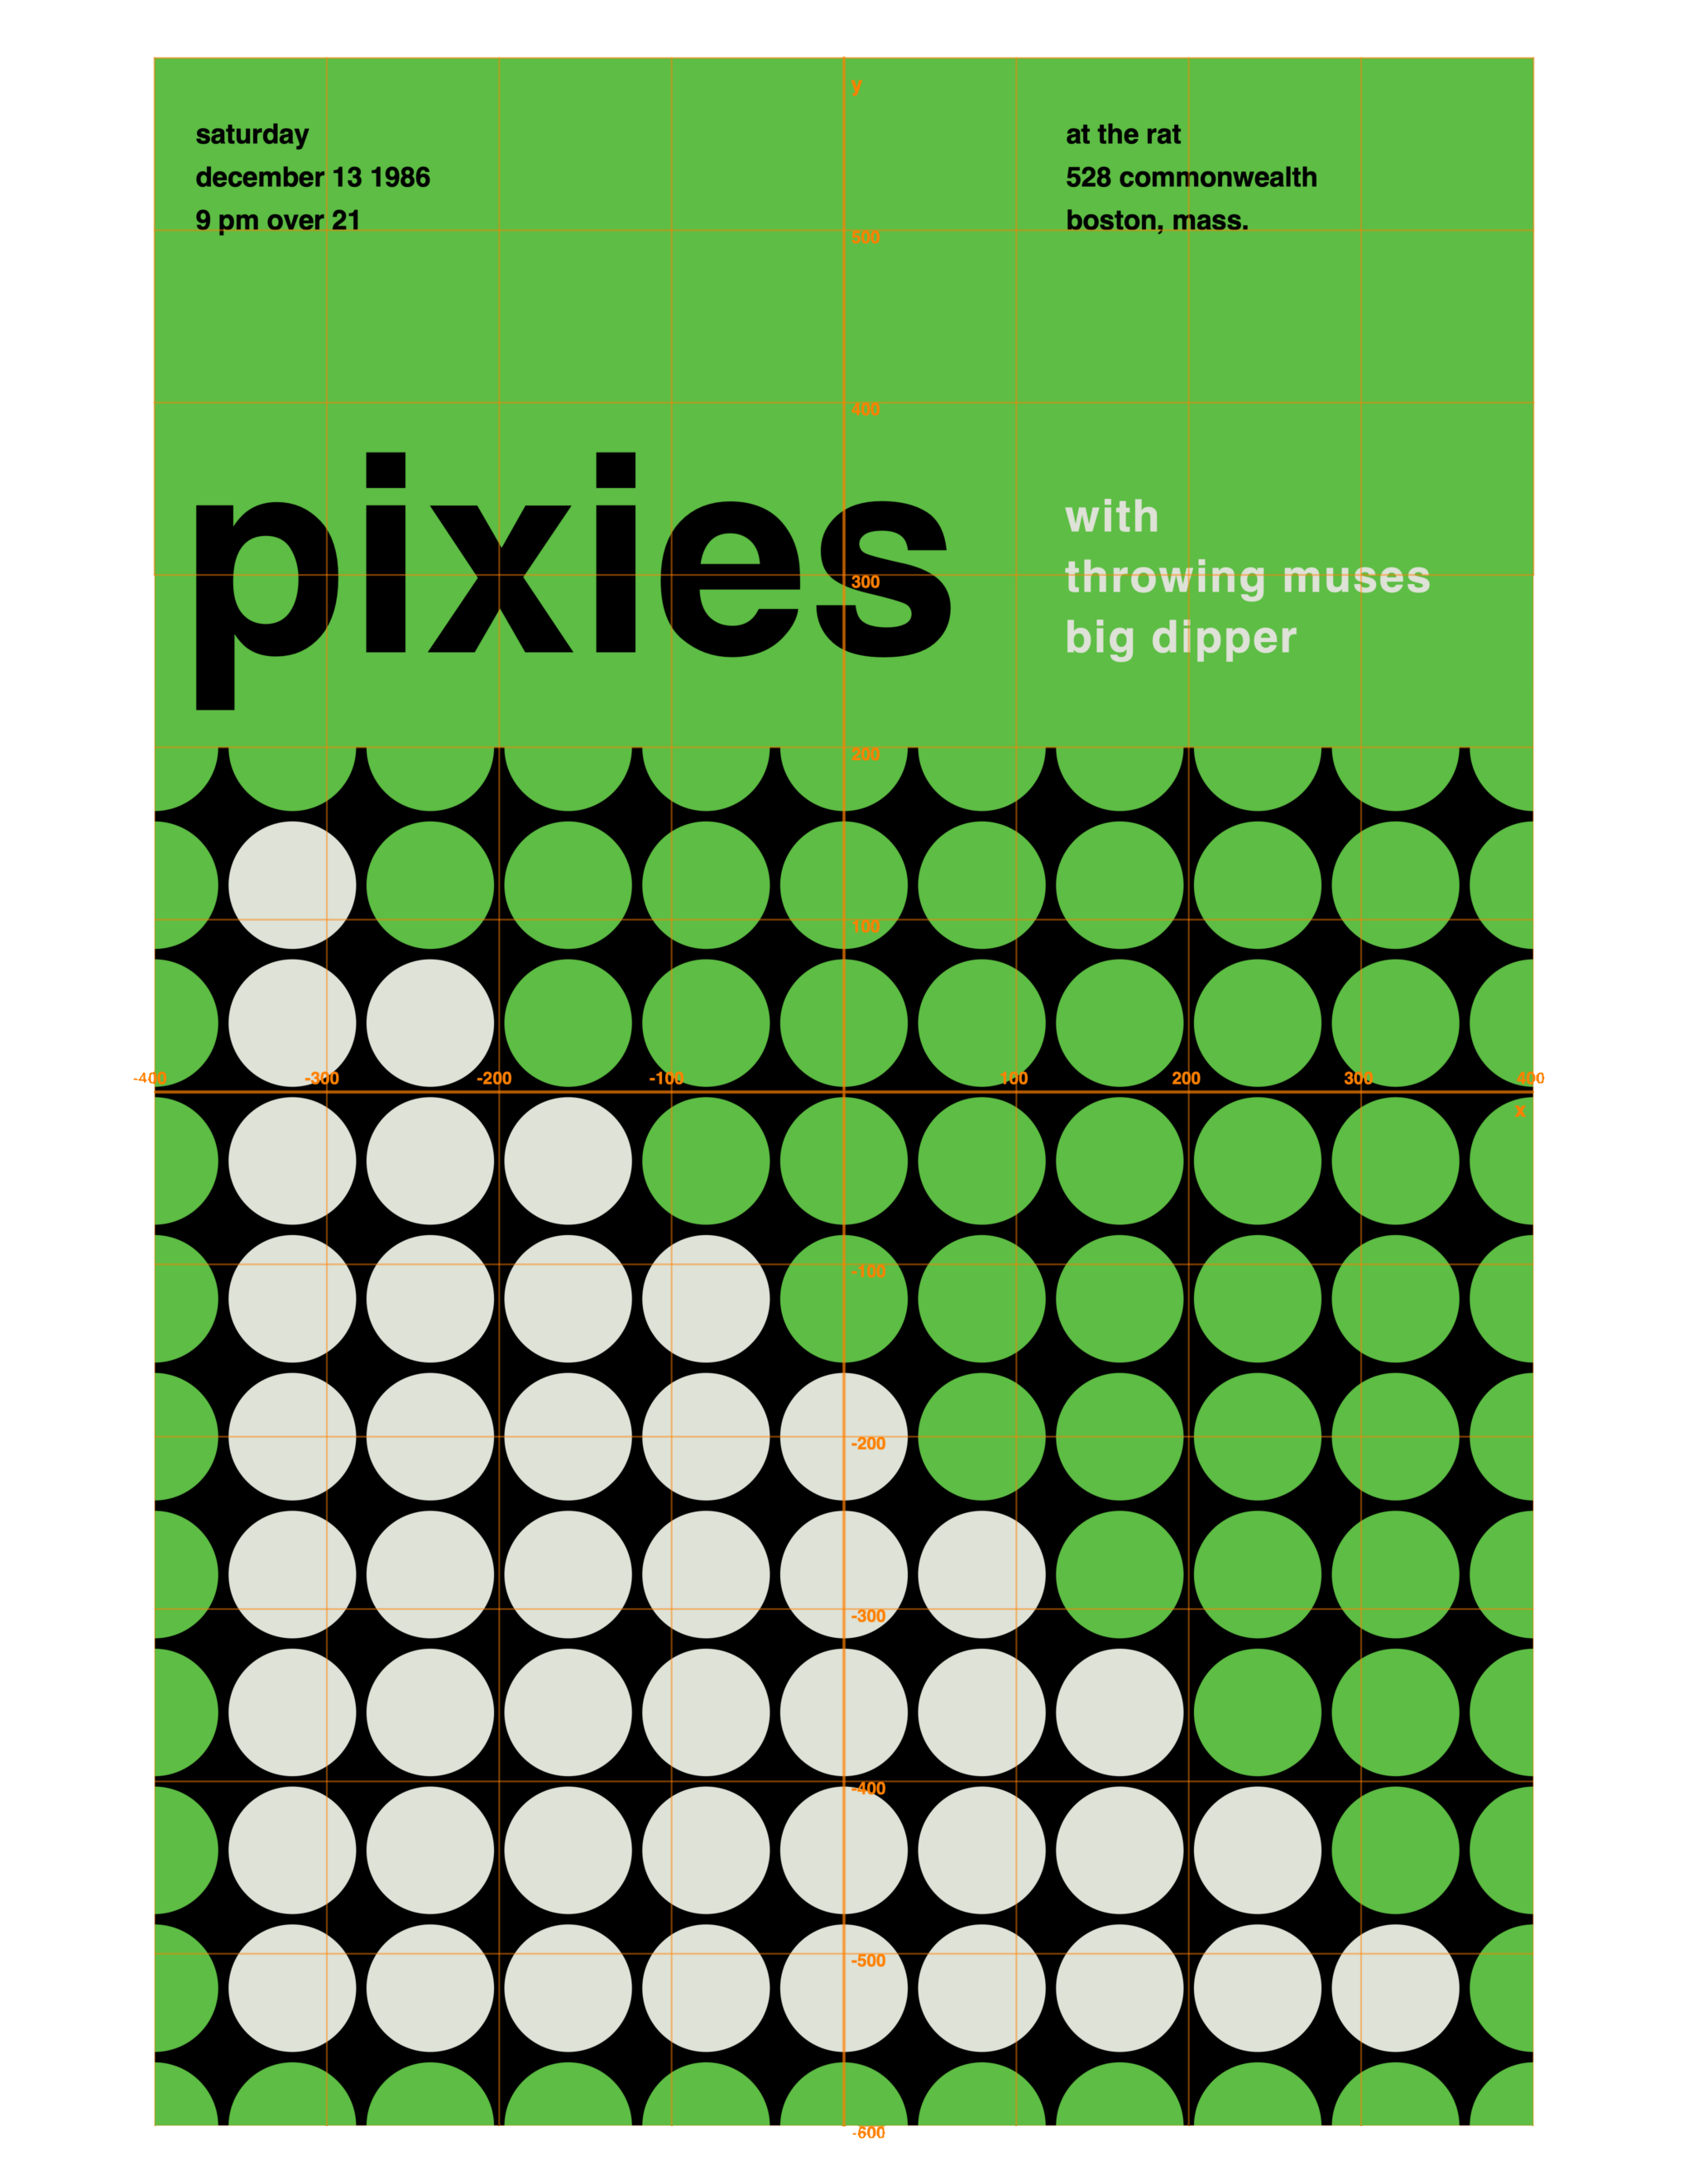
Use the planning sheet provided in class to analyse the poster.
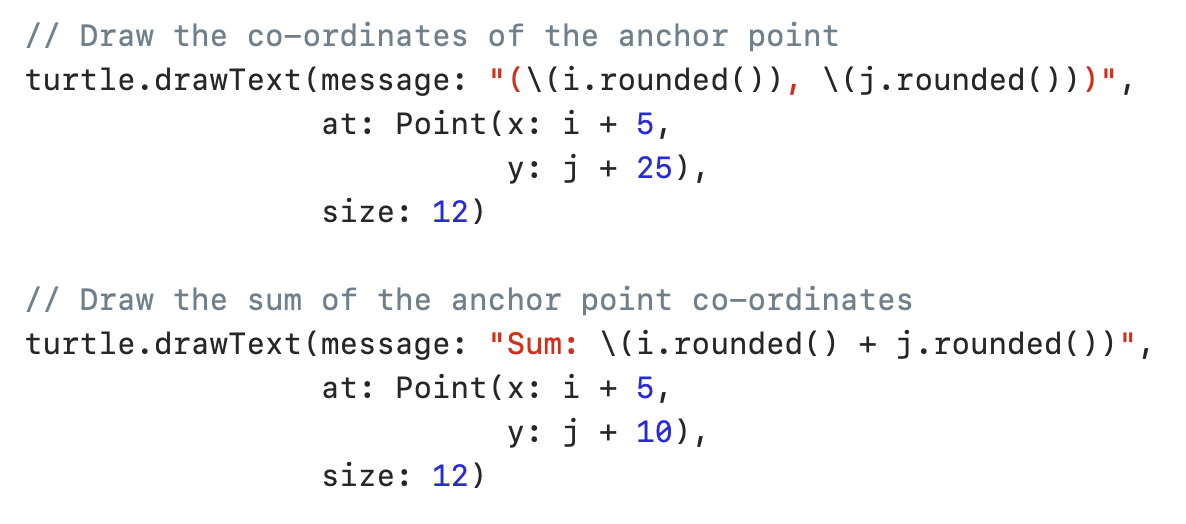
It will be helpful to have the following code in your program at some point, to see the position and co-ordinates of each circle:
// Draw the co-ordinates of the anchor point
turtle.drawText(message: "(\(i), \(j))",
				at: Point(x: i - 30,
					  y: j),
				size: 12)

// Draw the sum of the anchor point co-ordinates
turtle.drawText(message: "Sum: \(i + j)",
				at: Point(x: i - 30,
					  y: j - 10),
				size: 12)